자바의 DelayQueue는 java.util.concurrent 패키지에 들어있는 클래스로 AbstractQueue를 상속받고 있으며 BlockingQueue 인터페이스를 구현한다.

DelayQueue는 엘리먼트의 딜레이 시간을 기반으로 동작하는 Priority Queue라고 생각하면 된다. 즉 엘리먼트들이 Delay 시간을 기준으로 정렬되어 가장 빨리 딜레이 시간이 끝나는 엘리먼트가 큐의 헤드쪽에 위치한다.
큐에서 엘리먼트를 꺼낼 때, 엘리먼트의 딜레이 시간이 지나지 않았다면 소비할 수 없다.
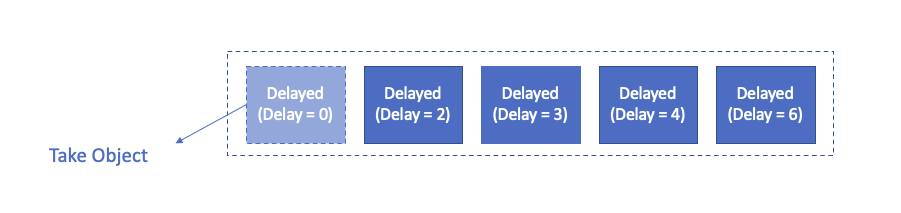
이후 딜레이 시간이 0보다 작은 숫자가 리턴되면 그 때서야 엘리먼트를 꺼내 쓸 수 있다.
DelayQueue 클래스
DelayQueue는 다음과 같은 상속 구조를 가지고 있다.
public class DelayQueue<E extends Delayed> extends AbstractQueue<E>
   implements BlockingQueue<E>
AbstractQueue를 상속하며 BlockingQueue를 구현한다.
중요한 포인트는 DelayQueue의 제네릭 타입이다. 제네릭 타입 정보를 보면 DelayQueue가 다룰 수 있는 엘리먼트는 Delayed 인터페이스를 구현해야 함을 알 수 있다.
Delayed 인터페이스
DelayQueue에 사용할 엘리먼트는 Delayed 인터페이스를 구현해야한다.
public interface Delayed extends Comparable<Delayed> {

    long getDelay(TimeUnit unit);
}
Delayed 인터페이스는 getDelay() 메소드를 정의해야한다. getDelay() 메소드는 DelayQueue에서 호출해 엘리먼트를 큐에서 꺼낼 수 있는지 여부를 판단하게 된다. getDelay() 메소드가 0이나 음수를 리턴하면 큐에서 꺼낼 수 있다는 의미다.
Delayed 인터페이스는 Comparable 인터페이스를 상속하고 있다. Comparable 인터페이스는 compareTo() 메소드를 정의해야한다. compareTo() 메소드는 두 엘리먼트의 딜레이 타임의 비교 연산이 들어가면 되는데, 이 메소드를 이용해 DelayQueue 안쪽에서 엘리먼트들의 순서를 정하게 된다.
예를 들어 DelayQueue에 사용할 DelayedObject 객체는 다음과 같이 정의할 수 있다.
public class DelayedObject implements Delayed {

    private final String data;
    private final long expTime;

    public DelayedObject(String data, long delayInMillis) {
        this.data = data;
        this.expTime = System.currentTimeMillis() + delayInMillis;
    }

    public String getData() {
        return data;
    }

    @Override
    public long getDelay(TimeUnit unit) {
        return unit.convert(expTime - System.currentTimeMillis(), TimeUnit.MILLISECONDS);
    }

    @Override
    public int compareTo(Delayed o) {
        DelayedObject that = (DelayedObject) o;
        int c = Long.compare(expTime, that.expTime);
        if (c != 0) {
            return c;
        }
        return Integer.compare(System.identityHashCode(this), System.identityHashCode(that));
    }
}
위에서 언급한 것처럼 getDelay() 메소드와 compareTo() 메소드를 구현했다.
DelayQueue 생산자/소비자 예제
위에서 구현한 DelayedObject를 이용한 생산자/소비자 예제 코드를 작성해보자. 생산자와 소비자를 정의하고, 각각을 별도의 스레드에서 동작하게 만드는 코드를 작성하자.
우선 DelayedObject를 생산해서 DelayQueue에 넣는 생산자는 다음과 같이 구현할 수 있다.
public class DelayQueueProducer implements Runnable {
    private final BlockingQueue<DelayedObject> queue;
    private final Integer numberOfElements;
    private final int delay;
    private final int interval;

    public DelayQueueProducer(BlockingQueue<DelayedObject> queue, int numberOfElements, int delay, int interval) {
        this.queue = queue;
        this.numberOfElements = numberOfElements;
        this.delay = delay;
        this.interval = interval;
    }

    @Override
    public void run() {
        for (int i = 0; i < numberOfElements; i++) {
            DelayedObject object = new DelayedObject(UUID.randomUUID().toString(), delay);
            System.out.println("(" + Date.from(Instant.now()) + ") Put object : " + object.getData());

            try {
                queue.put(object);
                Thread.sleep(interval);
            } catch (InterruptedException ie) {
                ie.printStackTrace();
            }
        }
    }
}
생성자에서 DelayedObject를 생산해 넣을 DelayQueue 객체와 몇 개의 엘리먼트 생산할 것인지, 각 엘리먼트의 기본 딜레이는 얼마나 줄 것이며, 엘리먼트들을 몇 밀리세컨드 단위로 만들 것인지를 인자로 받았다.
run() 메소드에서 DelayedObject 객체를 만들고 DelayQueue에 넣는 동작을 정의했다.
비슷하게 DelayedObject를 DelayQueue로 부터 가져오는 소비자를 다음과 같이 구현할 수 있다.
public class DelayQueueConsumer implements Runnable {
    private final BlockingQueue<DelayedObject> queue;
    private final int numberOfElements;

    public DelayQueueConsumer(BlockingQueue<DelayedObject> queue, int numberOfElements) {
        this.queue = queue;
        this.numberOfElements = numberOfElements;
    }

    // standard constructors

    @Override
    public void run() {
        for (int i = 0; i < numberOfElements; i++) {
            try {
                DelayedObject object = queue.take();
                System.out.println("(" + Date.from(Instant.now()) + ") Get object : " + object.getData());
            } catch (InterruptedException e) {
                e.printStackTrace();
            }
        }
    }
}
소비자는 DelayQueue로부터 DelayedObject 객체를 가져온다.
마지막으로 생산자와 소비자를 만들어 별도의 스레드에서 구동하는 메인 스레드를 다음과 같이 작성해보자.
public class Main {

    public static void main(String[] args) throws InterruptedException {
        ExecutorService executor = Executors.newFixedThreadPool(2);

        BlockingQueue<DelayedObject> queue = new DelayQueue<>();
        int numberOfElements = 3;
        int interval = 1000;
        int delay = 5000;

        DelayQueueProducer producer = new DelayQueueProducer(queue, numberOfElements, delay, interval);
        DelayQueueConsumer consumer = new DelayQueueConsumer(queue, numberOfElements);

        // Run Producer / Consumer
        executor.submit(producer);
        executor.submit(consumer);

        // Wait for termination
        executor.shutdown();
        executor.awaitTermination(10, TimeUnit.SECONDS);
    }
}
ExecutorService를 이용해서 생산자와 소비자를 구동한다. 총 3개의 DelayedObject 객체가 생산자에서부터 만들어져 소비자로 전달될 예정이며, DelayedObject 객체는 1초마다 만들어지고 각 엘리먼트의 딜레이는 5초다.
결과는 다음과 같다.
(Wed Apr 26 21:49:27 KST 2023) Put object : 31297989-2021-40bc-a557-c211d7fdd8e6
(Wed Apr 26 21:49:28 KST 2023) Put object : 0cb88e0b-e839-4b0c-af70-dd29ac5be280
(Wed Apr 26 21:49:29 KST 2023) Put object : 1eac1150-e2a1-46c2-9e0e-1c77429dc0a3
(Wed Apr 26 21:49:32 KST 2023) Get object : 31297989-2021-40bc-a557-c211d7fdd8e6
(Wed Apr 26 21:49:33 KST 2023) Get object : 0cb88e0b-e839-4b0c-af70-dd29ac5be280
(Wed Apr 26 21:49:34 KST 2023) Get object : 1eac1150-e2a1-46c2-9e0e-1c77429dc0a3
딜레이 5초짜리 엘리먼트를 1초마다 만들어 총 3개의 엘리먼트를 큐에 집어넣었다. 그리고 3초가 지나 첫 번째 엘리먼트의 딜레이가 만료되면 엘리먼트가 1초마다 소비되기 시작한다.
만약 딜레이없이 엘리먼트가 바로 소비되기를 원한다면 DelayedObject 생성시 딜레이를 0으로 주면 된다. 그러면 getDelay() 메소드가 0 혹은 음수를 바로 리턴하게 되고, 딜레이 없이 엘리먼트가 바로 소비된다.


댓글